Accounting Dimension Repost
This report explores implementing accounting dimensions to streamline our chart of accounts, improve financial statement accuracy, and gain deeper financial insights. It covers setup, application, and
How to Update Accounting Entries in Your System
Edits of accounting dimensions in the ERXpand can be done on all transactions, for example sales invoice, purchase invoices etc., but for the purpose of this illustration we will be using journal entry.
Updating accounting dimension in the ERPxpand can be straightforward and user friendly if you follow these steps:
Access Journal Entries:
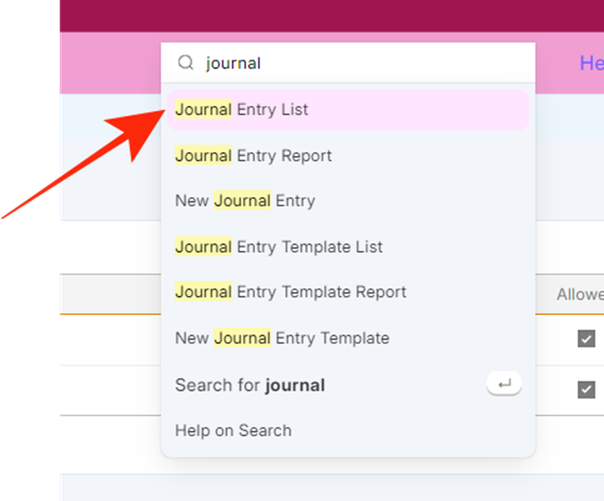
- Type “journal entry list” in the search box.
- Select journal entry list from the option list.
Choose Your Account
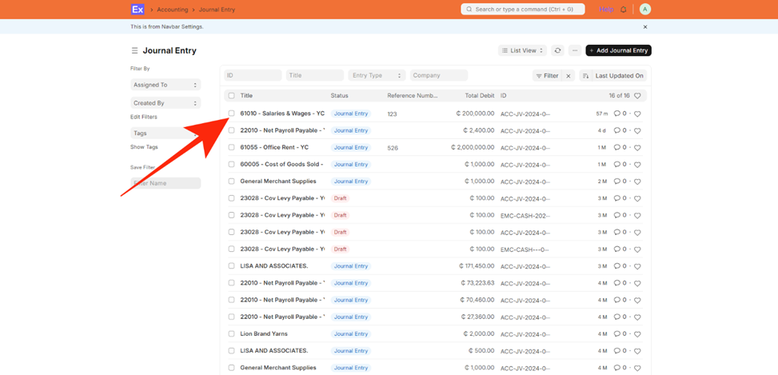
- From the list of accounts, select your desired account.
Select an Accounting Entry

- Navigate to the accounting entries and choose the specific entry you want to edit.
Edit the Entry:
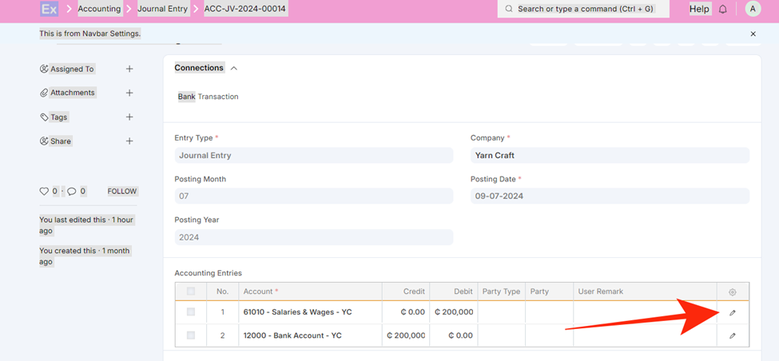
- Click on the edit icon located on the extreme left, under the settings icon.
Set Accounting Dimensions:
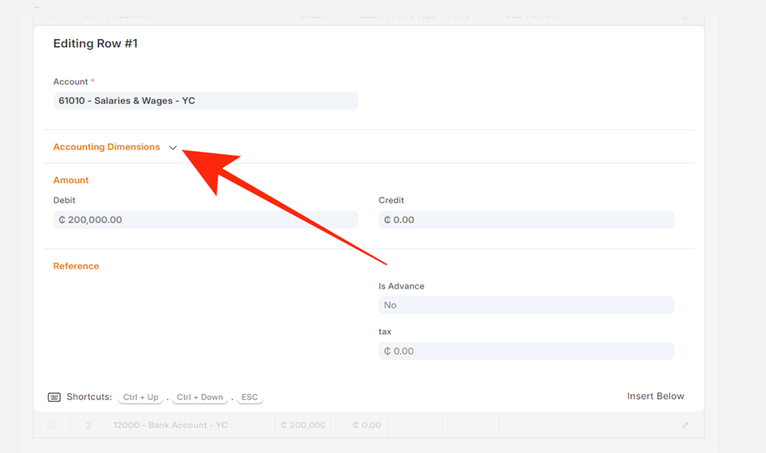
Click on the Accounting Dimensions tab to display the section.

- Select your preferred “accounting dimension.”
- Click outside the dialog box to return to the previous screen.
- Note: Clear accounting dimensions which is in the tab and set your preferred dimensions from the list option
Finalize Changes:
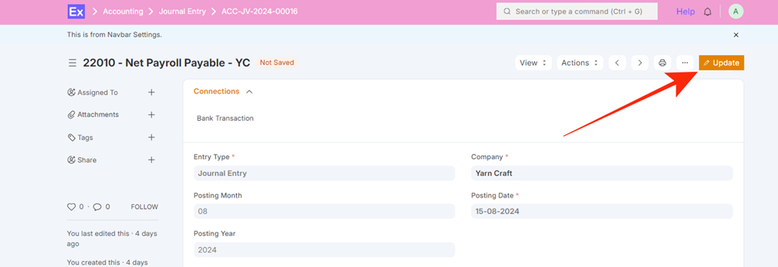
- Scroll up and select “update.”
Repost Accounting Entries:
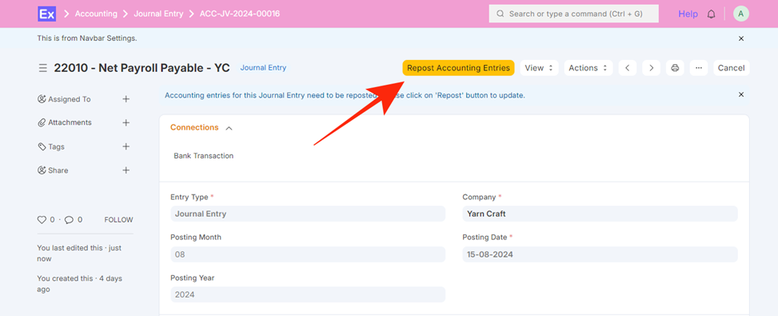
- Finally, select “repost accounting entries” to initiate reposting of the accounting to the new dimension update.

You will receive a pop-up notification indicating the accounting entries are reposted.
By following these steps, you can efficiently update accounting dimension and repost your accounting entries, ensuring your records are accurate and up-to-date.
How to Set Up Your Accounting Ledger
Setting up an accounting ledger is a vital step when updating accounting dimensions and reposting entries. Without configuring which transaction documents are permitted for reposting, the system will prevent you from reposting, even after updating the accounting dimensions. Follow these simple steps to get started:
Search for the Repost Accounting Ledger settings:
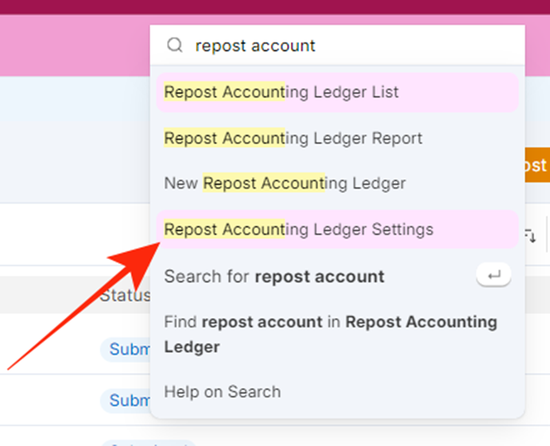
- Begin by typing “accounting ledger” in the search box.
- Select the Repost Accounting Ledger setting from the list options.
Add a New Row:

- Click on the option to add a new row to the list of allowed documents.
Select the Accounting Transaction:
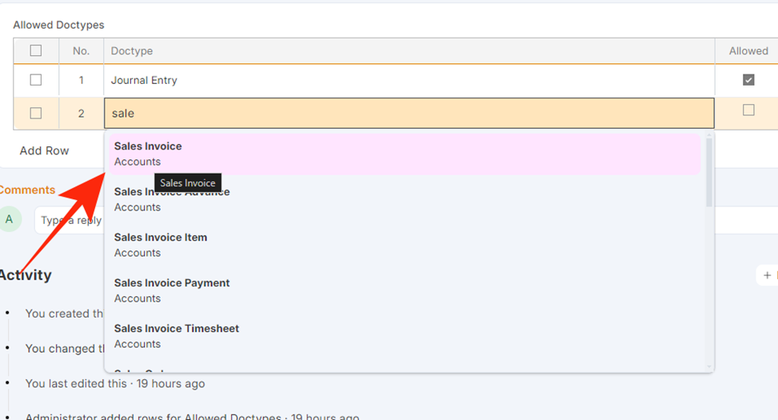
- Type to search for the specific accounting transaction you want to record.
Enable the Transaction:
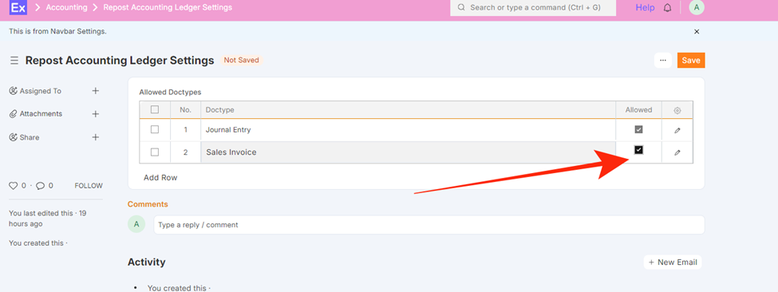
- Tick the checkbox labeled “Allowed” on the right side to enable the transaction.
Save Your Changes:

- Finally, click on the “Save” button to store your new entry.
By following these steps, you can ensure that your accounting ledger is up-to-date and accurately reflects your financial transactions. Keeping a well-maintained ledger is essential for generating accurate financial reports and making informed business decisions.
No comments yet. Login to start a new discussion Start a new discussion